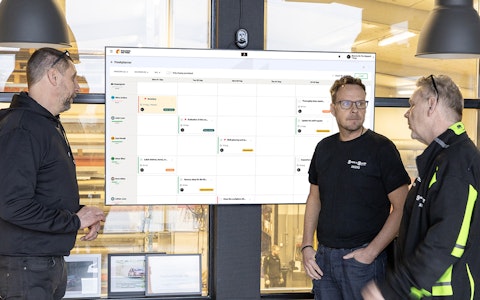
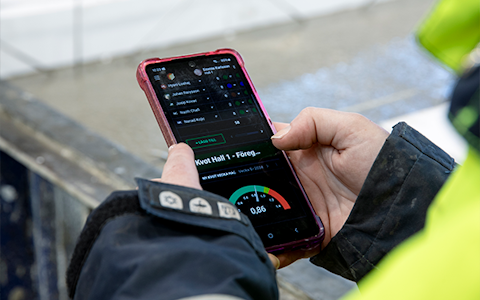
Digital dashboards that help you identify deviations and make the right decisions.

Capture your deviations and turn them into improvements

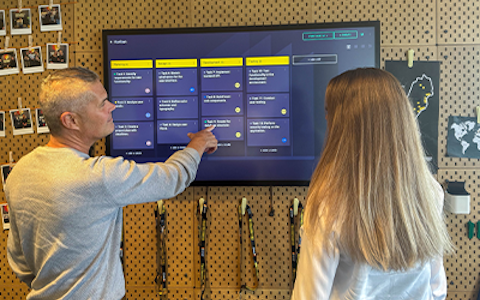
Continuous improvement, Kaizen boards, PDCA and other tools.
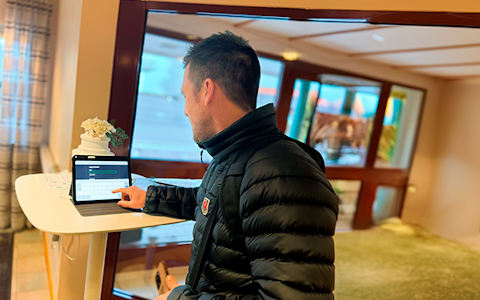
All your team’s tasks, neatly organized in one weekly view.
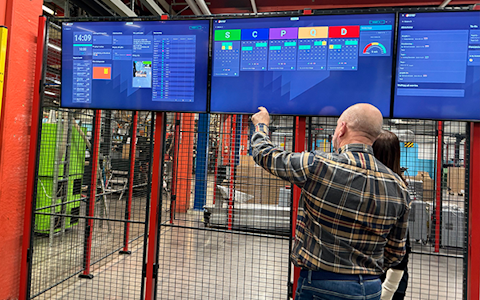
Improve key performance indicators within your specific focus areas with our SQCDP board.

Use the PDCA cycle as a tool to improve both quality and processes
Digital tools for 5S work, recurring audits, and a well-organized workplace.
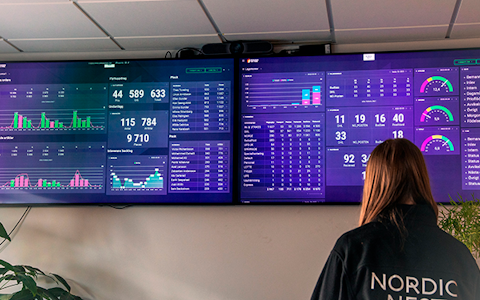
Visualize KPIs and communicate effectively throughout the entire organization.

Basic project management and activity boards.
Kanban is a powerful method for visualizing, managing, and optimizing workflows.

Digital dashboards for takt time flow with takt time counter and stop time log.
Digital visitor registration provides full control over all planned and executed visits to your business.
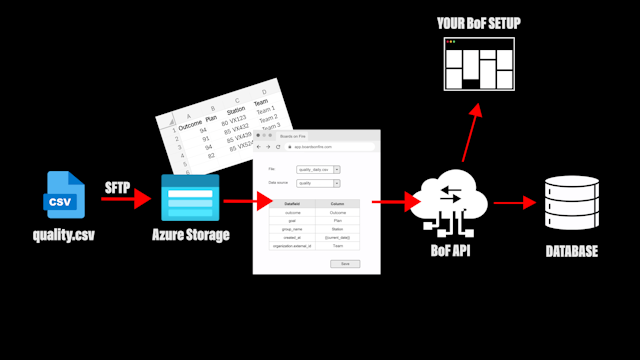
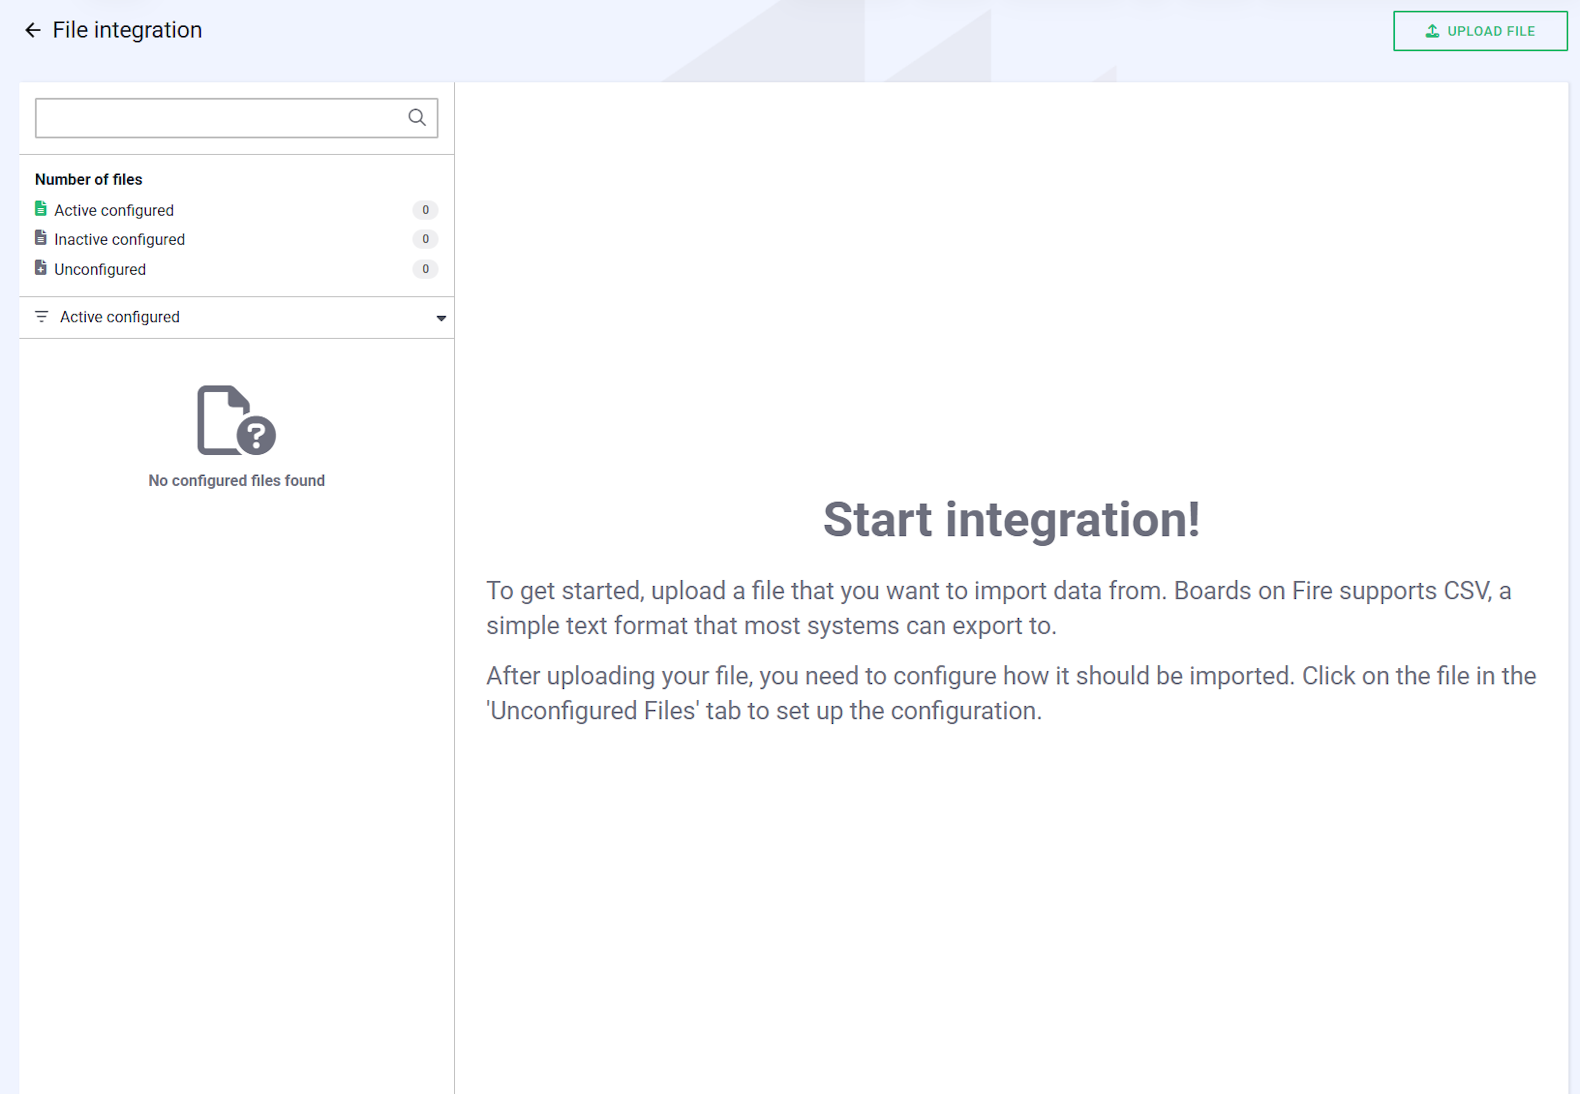
File integration in Boards on Fire allows you to easily connect CSV files from other systems and define how each column maps to the system’s fields. This ensures that your data is imported accurately, structured correctly, and immediately available for reporting and analysis.
This guide takes you through the entire process, from the initial upload to the completed mapping, ensuring your imports run smoothly.
Please note: File integration is an add-on service. Want to activate this feature? Contact our support team or learn more about our packages at https://boardsonfire.com/en/prices.
You can import data into Boards on Fire in two ways: either directly through the new interface or via an SFTP account. Here is how to perform a manual upload:
Tip: If you have multiple files, it is helpful to name them clearly before uploading. This makes it easier to stay organized within the File Integration interface.
To ensure you can act quickly if something goes wrong, the system has a built-in notification feature. Here are three things to keep in mind:
The number of active files you can have in your File Integration depends on which package your organization uses. Each package has a set base level for the number of allowed files.
It is useful to understand the difference between uploaded files and active configurations:
After you have configured your file and tested sending data, you may want to change something in the configuration. What you cannot change in a configured file is the separator and what kind of source you use in Boards On Fire. You can change all other fields in the configuration afterwards. If you need to change the source or separator in an already configured file, you must delete the old one and upload the file again and make a completely new configuration.
To make changes to an existing configured file, do the following:
External IDs in Boards on Fire make it easy to connect data from external systems without having to manage internal ID numbers. With external IDs, you can map data directly to the correct organization in Boards on Fire. Each organization can have multiple unique external IDs linked to different integration sources. The result is a smooth and efficient import process that saves time and reduces the risk of errors. If you want to read more about external IDs, you can do so here.
There are two ways to add external IDs to your Boards On Fire environment.
Option 1.
Option 2.
There are two ways to upload files to Boards On Fire. Either via the file integration directly or via an SFTP account. Here you can read more about how an SFTP account works and how to create one directly in your environment.
SFTP (SSH File Transfer Protocol or Secure File Transfer Protocol) is a protocol for secure file transfer over networks. Unlike traditional FTP, SFTP uses encryption via SSH, which makes both authentication and file transfer secure. The protocol uses port 22 and makes it possible to upload, download, delete and manage files and directories on a remote server.
To get started, you need to create an SFTP user in your BoF environment.
To create an SFTP user, go to the admin tab in the top left corner. Under integrations, click on File Integration and then click on SFTP User.
When you are in the SFTP user module, you can click on the tab in the top right corner called this is how you connect. Here you can read step by step how to do it and why. Follow the steps and create an SFTP user and you can then, via this, upload files to the SFTP account and directly to the file integration in Boards On Fire.
Inside the SFTP user module, click on the +Add tab in the top right corner. Here you will get your username and password. NOTE! It is important to remember that the password is only displayed once. Save this information so that you can then log in to your client.
You can recreate a password if you have forgotten your existing one. You will then get a new password, but it is important that you log in with the new password on the user it applies to. The configurations you have made, linked to the users, will not work until you have logged in with the new password.
To recover a password, click on the three dots to the right of the user in question and then click Recover password.
Customer administrators and those with extended rights are the ones who will have access to SFTP users and File Integration.
Below are some general tips on how to import data depending on the data type.
If the text contains line breaks, it should be enclosed in quotation marks.
Example:
Add text with line break within quotes, i.e:
text;date
"row1
row2
row3";2026-03-04
"row1
row2
row3";2026-03-05
This ensures that the line breaks are preserved during the import.
If the field is of type Rich Text, line breaks should instead be written using the HTML tag <br>.
Example:
Use <br>, i.e: text;date
row1<br>row2<br>row3;2026-03-04
row1<br>row2<br>row3;2026-03-05
The tag creates line breaks in the rich text field after the import.
We offer both standard packages for digital daily management tailored to businesses of various sizes and customized solutions for Enterprise customers. More info >>
In Boards on Fire, it is possible to customize the board layouts to suit your specific needs. By modifying the layout, you can create a visual structure that simplifies your workflow. You can find this option under the board’s Settings
Free web demo